In our step-by-step guide on “How to install a security camera,” we aim to help you secure your home or office and provide you with peace of mind. Did you know that the average burglary occurs every 13 seconds in the United States? Shocking, right?
Now, let’s get down to business. Our guide will walk you through the entire installation process, from choosing the right camera to mounting and configuring it. We understand that setting up a security camera system can seem daunting, but don’t worry, we’re here to assist you every step of the way.
By following our detailed instructions, you’ll learn how to assess your security needs, select the appropriate camera type, and determine the best location for installation. We’ll guide you through the necessary tools and equipment you’ll need, ensuring you have everything at your disposal.
Once you have all the hardware ready, we’ll explain how to mount the camera securely, so it captures the desired area effectively. We’ll also provide guidance on running the necessary cables and connecting them to power and your recording device.
Configuring the camera is another crucial aspect we cover in our guide. We’ll explain how to access the camera’s settings and adjust them according to your preferences. Additionally, we’ll walk you through the process of connecting your camera to your home network, enabling remote monitoring from your smartphone or computer.
Finally, we’ll conclude our guide with essential tips on maintaining and troubleshooting your security camera system, ensuring it remains fully functional and reliable.
Remember, installing a security camera doesn’t have to be overwhelming. With our step-by-step guide, we’ll empower you to take control of your security. Let’s get started together!
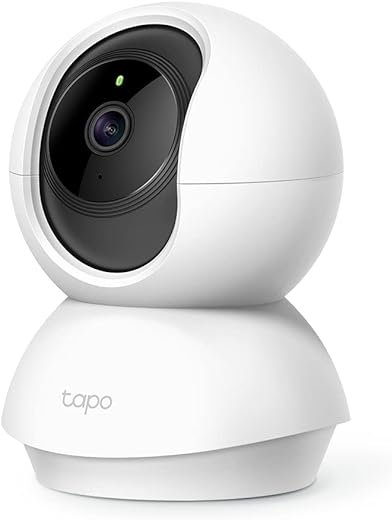
Top-rated surveillance camera options
Gather the necessary equipment
Before starting the installation process, it is crucial to gather all the necessary equipment. This will ensure a smooth and efficient setup of your security camera system. Here is a list of essential items you will need:
- Security Camera: Choose a camera that suits your specific surveillance needs. Consider factors such as resolution, coverage area, and whether it is suitable for indoor or outdoor use.
- Power Cables: Ensure you have the appropriate power cables for your cameras. Depending on the system, you may need individual power cables for each camera or a centralized power supply.
- Mounting Brackets: These brackets are used to securely attach the cameras to walls, ceilings, or other surfaces. Make sure you have the correct brackets for the type of camera and the installation location.
- Screws: You will need screws to fasten the mounting brackets to the desired surfaces. Ensure they are of the appropriate size and material for the installation environment.
- Drill: A drill is necessary to create holes for mounting the brackets. Ensure you have the right drill bits suitable for the surface you are drilling into (e.g., wood, concrete).
- Monitor or Recording Device: Consider whether you want to view the camera feed live on a monitor or record the footage for later viewing. Choose a monitor or recording device that is compatible with your camera system.
- Connectivity Cables: Check which cables you need to connect the cameras to the recording device or monitor. Common options include coaxial cables, Ethernet cables, or wireless adapters.
By gathering all the necessary equipment beforehand, you can avoid interruptions during the installation process and ensure that your security camera system functions optimally.

Choose the optimal location
When selecting the location for your security camera, carefully consider several factors. First, determine the specific area you want to monitor and choose a location that provides the best view of that area. Next, take into account the camera’s field of view and ensure that it covers the desired area effectively.
Additionally, be mindful of any potential obstructions that may hinder the camera’s visibility, such as trees, walls, or other structures. It is crucial to place the camera in a position that minimizes any potential obstructions and maximizes its line of sight.
Furthermore, it is important to install the camera at an appropriate height and angle for optimal coverage. Position the camera at a height that allows it to capture the desired area without any significant blind spots. Adjust the camera’s angle to ensure it captures the necessary details accurately.
By carefully selecting the location, taking into account the area to monitor, the camera’s field of view, and any obstructions, and ensuring an appropriate height and angle, you can optimize the performance and effectiveness of your security camera system.
Mount the camera
To securely mount the camera, first, gather the mounting brackets and screws included with the camera. Choose a suitable location for installation, ensuring it provides optimal surveillance coverage.
Using the brackets, position the camera in the desired orientation and mark the spots where the screws will be inserted. Make sure the camera is stable and properly aligned to capture the intended area.
Next, attach the brackets to the camera housing using the provided screws, ensuring they are tightened securely. Then, align the brackets with the chosen location and mark the spots where the screws will be inserted on the mounting surface.
Using a drill, create pilot holes at the marked spots to ensure easy screw insertion. With the pilot holes ready, align the brackets with the holes and attach them to the mounting surface using the screws provided.
Finally, double-check the camera’s stability and alignment, ensuring it is securely mounted and offering the desired surveillance coverage. Adjust as necessary, and tighten any loose screws to ensure a secure installation.
By following these steps, you can mount the camera using the mounting brackets and screws, ensuring it is stable, aligned, and ready to provide the desired surveillance coverage.
Connect the power source
To connect the power cable of the camera, follow these steps:
- Locate a nearby power source, such as an electrical outlet or a power over Ethernet (PoE) switch.
- Plug one end of the power cable into the power input of the camera.
- Plug the other end of the power cable into the electrical outlet or the PoE switch.
- Ensure that the power connection is secure by pushing the cable firmly into the socket.
- Check if your camera supports PoE by referring to the camera’s documentation or specifications.
- If using PoE, make sure the PoE switch is properly connected to the network and supplying power to the camera.
- Verify that the camera receives the necessary power supply by checking the camera’s LED indicators for any power-related status lights.
For example, if your camera has a power input labeled “DC IN,” you would connect one end of the power cable to this input and the other end to an electrical outlet. If your camera supports PoE, you could plug the power cable into a PoE switch, which is connected to both the camera and the network.
Remember, it is important to ensure a secure power connection to prevent any power interruptions or damage to the camera.
Configure the camera settings
To access the camera’s settings, you can either use a dedicated software provided by the manufacturer or access the camera’s web-based interface through a web browser. Once you have opened the software or entered the camera’s IP address in the browser, you will be presented with a login screen. Enter your username and password to log in.
After logging in, you will be directed to the camera’s settings page. Here, you can configure various parameters according to your preferences. One important setting is the resolution, which determines the quality of the video captured by the camera. You can usually choose from a range of resolutions such as 720p, 1080p, or even higher.
Another useful setting is motion detection. By enabling this feature, the camera will only start recording when it detects movement within its field of view. This can be helpful to save storage space and focus on relevant events. Adjust the sensitivity level to ensure that the camera captures the desired amount of motion.
Furthermore, you can set up a recording schedule to determine when the camera should start and stop recording. For example, you can specify that the camera should record only during specific hours of the day or on certain days of the week. This allows you to customize the camera’s behavior to match your needs.
Depending on the specific camera model, there may be additional features available for configuration. These can include options like adjusting brightness, contrast, or saturation levels, configuring audio settings, or enabling notifications for certain events.
Remember to save your settings after making any changes to ensure they are applied. It’s also a good idea to regularly check and update the camera’s settings to adapt to changing requirements or optimize its performance.
Connect the camera to a monitor or recording device
To connect the camera to a monitor or recording device, start by identifying the type of cables that are compatible with your camera and recording device. If both devices have HDMI ports, you can simply use an HDMI cable to connect them. Plug one end of the HDMI cable into the HDMI output port on your camera and the other end into the HDMI input port on the monitor or recording device. Make sure both devices are turned on and set to the correct input source.
If your camera or recording device does not have an HDMI port, you may need to use a VGA cable instead. Connect one end of the VGA cable to the VGA output port on your camera and the other end to the VGA input port on the monitor or recording device. Again, ensure that both devices are powered on and set to the appropriate input source.
In some cases, you may have a network-enabled camera and recording device. To connect them, you will need to use network cables. Plug one end of the network cable into the LAN port on your camera and the other end into the LAN port on the recording device. Ensure that both devices are connected to the same network and have the necessary network settings configured.
Remember to consult the user manuals for your specific camera and recording device for any additional instructions or troubleshooting tips.
Test the camera
To test the camera after installation and configuration, follow these steps:
- Check the live feed: Open the camera viewing software or app and ensure that you can see a live feed from the camera. Make sure the image is clear and the camera is capturing the intended area. If you cannot see a live feed, double-check the camera’s power and network connection.
- Adjust settings if necessary: Explore the camera settings to ensure they are configured correctly. Adjust parameters such as resolution, frame rate, brightness, and contrast to optimize the image quality. Test different settings and observe the impact on the live feed to find the optimal setup.
- Verify effective capture: Walk around the areas you want the camera to monitor and make sure it is capturing everything you need. Check for blind spots or areas where the camera’s view might be obstructed. Ensure the camera can cover the desired field of view, whether it’s a specific room, entrance, or outdoor area.
By following these steps, you can ensure that the camera is functioning correctly and capturing the desired areas effectively. If any issues arise during the testing process, refer to the camera’s user manual or contact customer support for further assistance.
Final thoughts and recommendations
In conclusion, we have outlined the step-by-step process for installing a security camera. By following these instructions, you will be able to ensure the effective installation of your camera, ultimately enhancing the security of your property or premises. Remember to gather all the necessary equipment and choose the best location for optimal coverage. Mount the camera securely and connect it to a stable power source. Configure the camera settings to suit your surveillance needs, and connect it to a monitor or recording device for live viewing or playback. Finally, perform a thorough test to verify the camera’s functionality. By following these guidelines, you can successfully install a security camera and enjoy the peace of mind that comes with enhanced surveillance.


