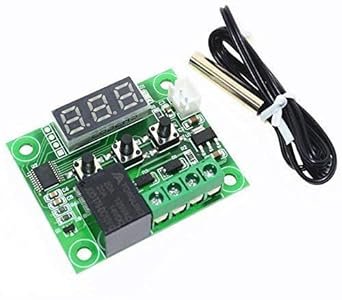
In this step-by-step guide, we will show you how to control a thermostat remotely. Thermostats are devices used to regulate the temperature in our homes or offices. This guide is designed to help you understand the functionality of thermostats and provide you with the knowledge and instructions needed to control them from anywhere. By following these steps, you will be able to conveniently manage your thermostat settings remotely, ensuring maximum comfort and energy efficiency.
Top-rated thermostats for optimal temperature control
Check compatibility
To ensure that your thermostat and HVAC system are compatible with remote control functionality, follow these steps:
- Consult the manufacturer’s specifications: Check the user manual or product specifications provided by the manufacturer. Look for information on remote control compatibility and see if your thermostat and HVAC system support this feature. Pay attention to any specific requirements or limitations mentioned.
- Contact customer support: If you are unable to find the necessary information in the product documentation, reach out to the manufacturer’s customer support. They can provide you with guidance regarding compatibility and answer any questions or concerns you may have. Be prepared to provide them with the model numbers and any other relevant details about your thermostat and HVAC system.
It is important to ensure compatibility between your thermostat and HVAC system before attempting to use remote control functionality. This will help avoid any potential issues and ensure a smooth and seamless experience. Following these instructions will help you determine whether your devices are compatible and seek further assistance if needed.
Connect to Wi-Fi
To connect your thermostat to your home Wi-Fi network, follow these simple steps. First, refer to the manufacturer’s instructions for your specific thermostat model. These instructions will provide you with the necessary information and steps to successfully connect your thermostat to Wi-Fi.
Typically, the process involves accessing the thermostat’s settings menu. This is usually done by pressing a specific button combination or navigating through a menu on the thermostat’s display. Once you are in the settings menu, look for an option related to Wi-Fi or network connectivity.
Select the Wi-Fi option, and your thermostat will start scanning for available networks. It might take a few moments for the thermostat to detect the Wi-Fi networks in range. Once the list of available networks appears on the display, select your home Wi-Fi network from the list.
If your home network is password-protected, you will be prompted to enter the network password. Use the thermostat’s interface, whether it’s a touch screen or buttons, to input the password. Make sure to enter the password accurately to avoid any connection issues.
After entering the password, confirm your selection, and the thermostat will attempt to connect to your Wi-Fi network. This process may take a few moments, and the thermostat will display a progress indicator or a message confirming the successful connection.
Once connected, your thermostat will display the Wi-Fi symbol or an indicator showing that it is now connected to your home network. This means your thermostat is now ready to be controlled and monitored remotely through the manufacturer’s companion app or any other compatible smart home platform.
Remember that the specific steps and interface may vary depending on your thermostat model, so carefully follow the manufacturer’s instructions provided with your device.
Download the app
To download and install the compatible mobile app for your thermostat, follow these simple steps:
- Check compatibility: Before you begin, make sure your thermostat is compatible with the mobile app. Refer to the manufacturer’s website or user manual for compatibility information.
- Search and download: Open the app store on your mobile device (such as the Apple App Store or Google Play Store) and search for the app. Look for the official app provided by the thermostat manufacturer. Once you find it, tap on the “Download” or “Install” button.
- Install the app: After the app finishes downloading, tap on the app icon to start the installation process. Follow the on-screen instructions to complete the installation. Depending on your device, you may need to grant certain permissions for the app to function properly.
- Create an account: Once the app is installed, open it and create an account if prompted. This usually involves providing your email address, creating a password, and agreeing to the app’s terms and conditions.
- Connect your thermostat: Follow the app’s instructions to connect your thermostat to your mobile device. This typically involves selecting your thermostat model from a list, entering any necessary identification codes or Wi-Fi credentials, and allowing the app to establish a connection.
- Start using the app: Once your thermostat is successfully connected, you can start using the app to control it remotely. Use the app’s intuitive interface to adjust the temperature, set schedules, and access other features offered by your thermostat.
By downloading and installing the compatible mobile app for your thermostat, you gain the convenience of controlling your thermostat from anywhere, providing you with comfort and energy savings.
Create an account
To create an account within the app, simply follow these easy steps:
- Download and Install: Start by downloading and installing the app on your smartphone or tablet. You can find the app in the App Store or Google Play Store, depending on your device.
- Launch the App: Open the app on your device and navigate to the login or sign-up page. You will typically find this option on the main screen or in the app’s menu.
- Provide the Necessary Information: Fill in the required fields with your personal information, such as your name, email address, and password. Make sure to choose a strong and unique password to secure your account.
- Verify Your Email: After providing your email address, you may need to verify it by clicking on a verification link sent to your inbox. This step ensures that the email address you entered is valid and belongs to you.
- Set up Remote Access: Once your account is created and verified, you can proceed to connect your thermostat to the app. Depending on the device, this may involve scanning a QR code or following the on-screen instructions to pair your thermostat with the app.
By following these steps, you will successfully create an account within the app and gain the ability to access and control your thermostat remotely. Enjoy the convenience of managing your thermostat settings from anywhere, at any time.
Pair the thermostat
To pair your thermostat with your account, follow these simple steps:
- Open the app: Start by opening the app on your smartphone or tablet. Make sure you have already created an account and logged in.
- Navigate to the pairing option: Look for the pairing option in the menu or settings section of the app. It may be labeled as “Pair Device” or something similar.
- Follow the instructions: Once you have located the pairing option, tap on it to begin the process. The app will guide you through the steps to pair your thermostat. This may involve entering a unique code provided with your thermostat or scanning a QR code.For example, if you’re required to enter a code, the app will display a field where you can input the code. Simply type in the code provided with your thermostat and tap on the “Next” button to proceed.On the other hand, if you need to scan a QR code, the app will activate your device’s camera. Align the QR code within the frame on your screen, and the app will automatically detect and pair your thermostat.
- Wait for confirmation: Once you have completed the pairing process, wait for the app to confirm that your thermostat has been successfully paired with your account. This confirmation may appear as a pop-up message or a notification.
Remember to follow the app’s instructions precisely, as the pairing process may vary depending on the specific app and thermostat you are using. By pairing your thermostat, you will be able to conveniently control and monitor your home’s temperature settings through the app.
Set up schedules
To configure your desired temperature settings and schedules within the app, follow these steps:
- Open the app and navigate to the settings menu.
- Look for the “Schedules” option and tap on it.
- You will see a list of the days of the week. Tap on the day you want to set a schedule for.
- Once you have selected the day, you will be presented with a timeline. Each line represents a time slot.
- Tap on a specific time slot to set the desired temperature for that period. A pop-up window will appear, allowing you to input the temperature.
- After inputting the temperature, you can also specify if you want the temperature to be adjusted based on your preferences. For example, you can choose to increase the temperature by 2 degrees during the morning hours or decrease it by 1 degree during the night.
- Repeat the process for each time slot you want to configure. You can set different temperature settings for different periods of the day.
- Once you have set the schedules for one day, you can repeat the process for other days of the week.
By following these instructions, you can easily configure your desired temperature settings and schedules within the app. This will allow you to automate temperature adjustments based on your preferences, ensuring that your home or office is always at the perfect temperature when you need it.
Start remote control
To start remote control, access the app on your smartphone or tablet. Tap on the thermostat icon to open the remote control interface. From here, you can adjust the temperature settings by simply sliding the temperature bar up or down. For example, if you want to increase the temperature, slide the bar towards the right. If you want to decrease the temperature, slide the bar towards the left. The app will instantly send the command to your thermostat, and the temperature will adjust accordingly.
In addition to temperature control, you can also set schedules for your thermostat using the app. Tap on the “Schedule” tab in the remote control interface. Select the day of the week you want to set a schedule for, and then tap on the desired time slot. A pop-up menu will appear, allowing you to choose the temperature you want for that specific time slot. You can create multiple schedules for different days and times according to your preferences.
Furthermore, the app provides you with an energy usage monitoring feature. You can view your energy usage in real-time by tapping on the “Energy” tab. It will display a graph showing your energy consumption patterns over a specific period. This allows you to track your usage and make informed decisions on how to optimize energy efficiency.
By following these simple steps, you can easily control your thermostat remotely using the app. Enjoy the convenience and flexibility of adjusting your home’s temperature, setting schedules, and monitoring energy usage from anywhere, at any time.
The Benefits of Remote Thermostat Control
In conclusion, we have explored the various ways to control a thermostat remotely. We have learned about the importance of a Wi-Fi enabled thermostat and the convenience it offers in adjusting temperature settings from anywhere. We have also discussed the different methods of remote control, including smartphone apps and voice assistants. Additionally, we have highlighted the benefits of remote thermostat control, such as energy savings and increased comfort. By following the steps outlined in this guide, you can now confidently take control of your thermostat from wherever you may be. Enjoy the convenience and efficiency of remote thermostat control!


